Science Saturdays, EYFS: Physical Processes
Science Saturdays are sessions which teach parents/carers and children valuable STEM skills. Our goals are to increase parents' confidence in STEM skills and STEM
activities, while providing the children opportunities to play with STEM toys, such as magnifying glasses. Another goal is to increase the community
amongst the year-group families. These sessions are appropriate for schools to use in the classroom, families to do as extra learning outside school, and/or for
families who Home School / Home Educate.
This series of webpages is intended to help others set up their own Science Saturdays. We hope these webpages are helpful and help us grow our collective STEM skills
for the future!
Team:
Mridusmita Danciu: Medical Professional
Nicolae Danciu: Aircraft Engineer
Barbara Vohmann: Quantity Surveying and Construction Management Academic
Ephraim Zulu: Quantity Surveying Academic
Sarinova Simanjuntak: Mechanical Engineering Academic
Jennifer Martay: Biomedical Engineering Academic
We focused on "Physical Processes" in our second Science Saturday. We used STEM Learning UK's "Science for Starters"
Physical Processes leaflet as a basis for the session.
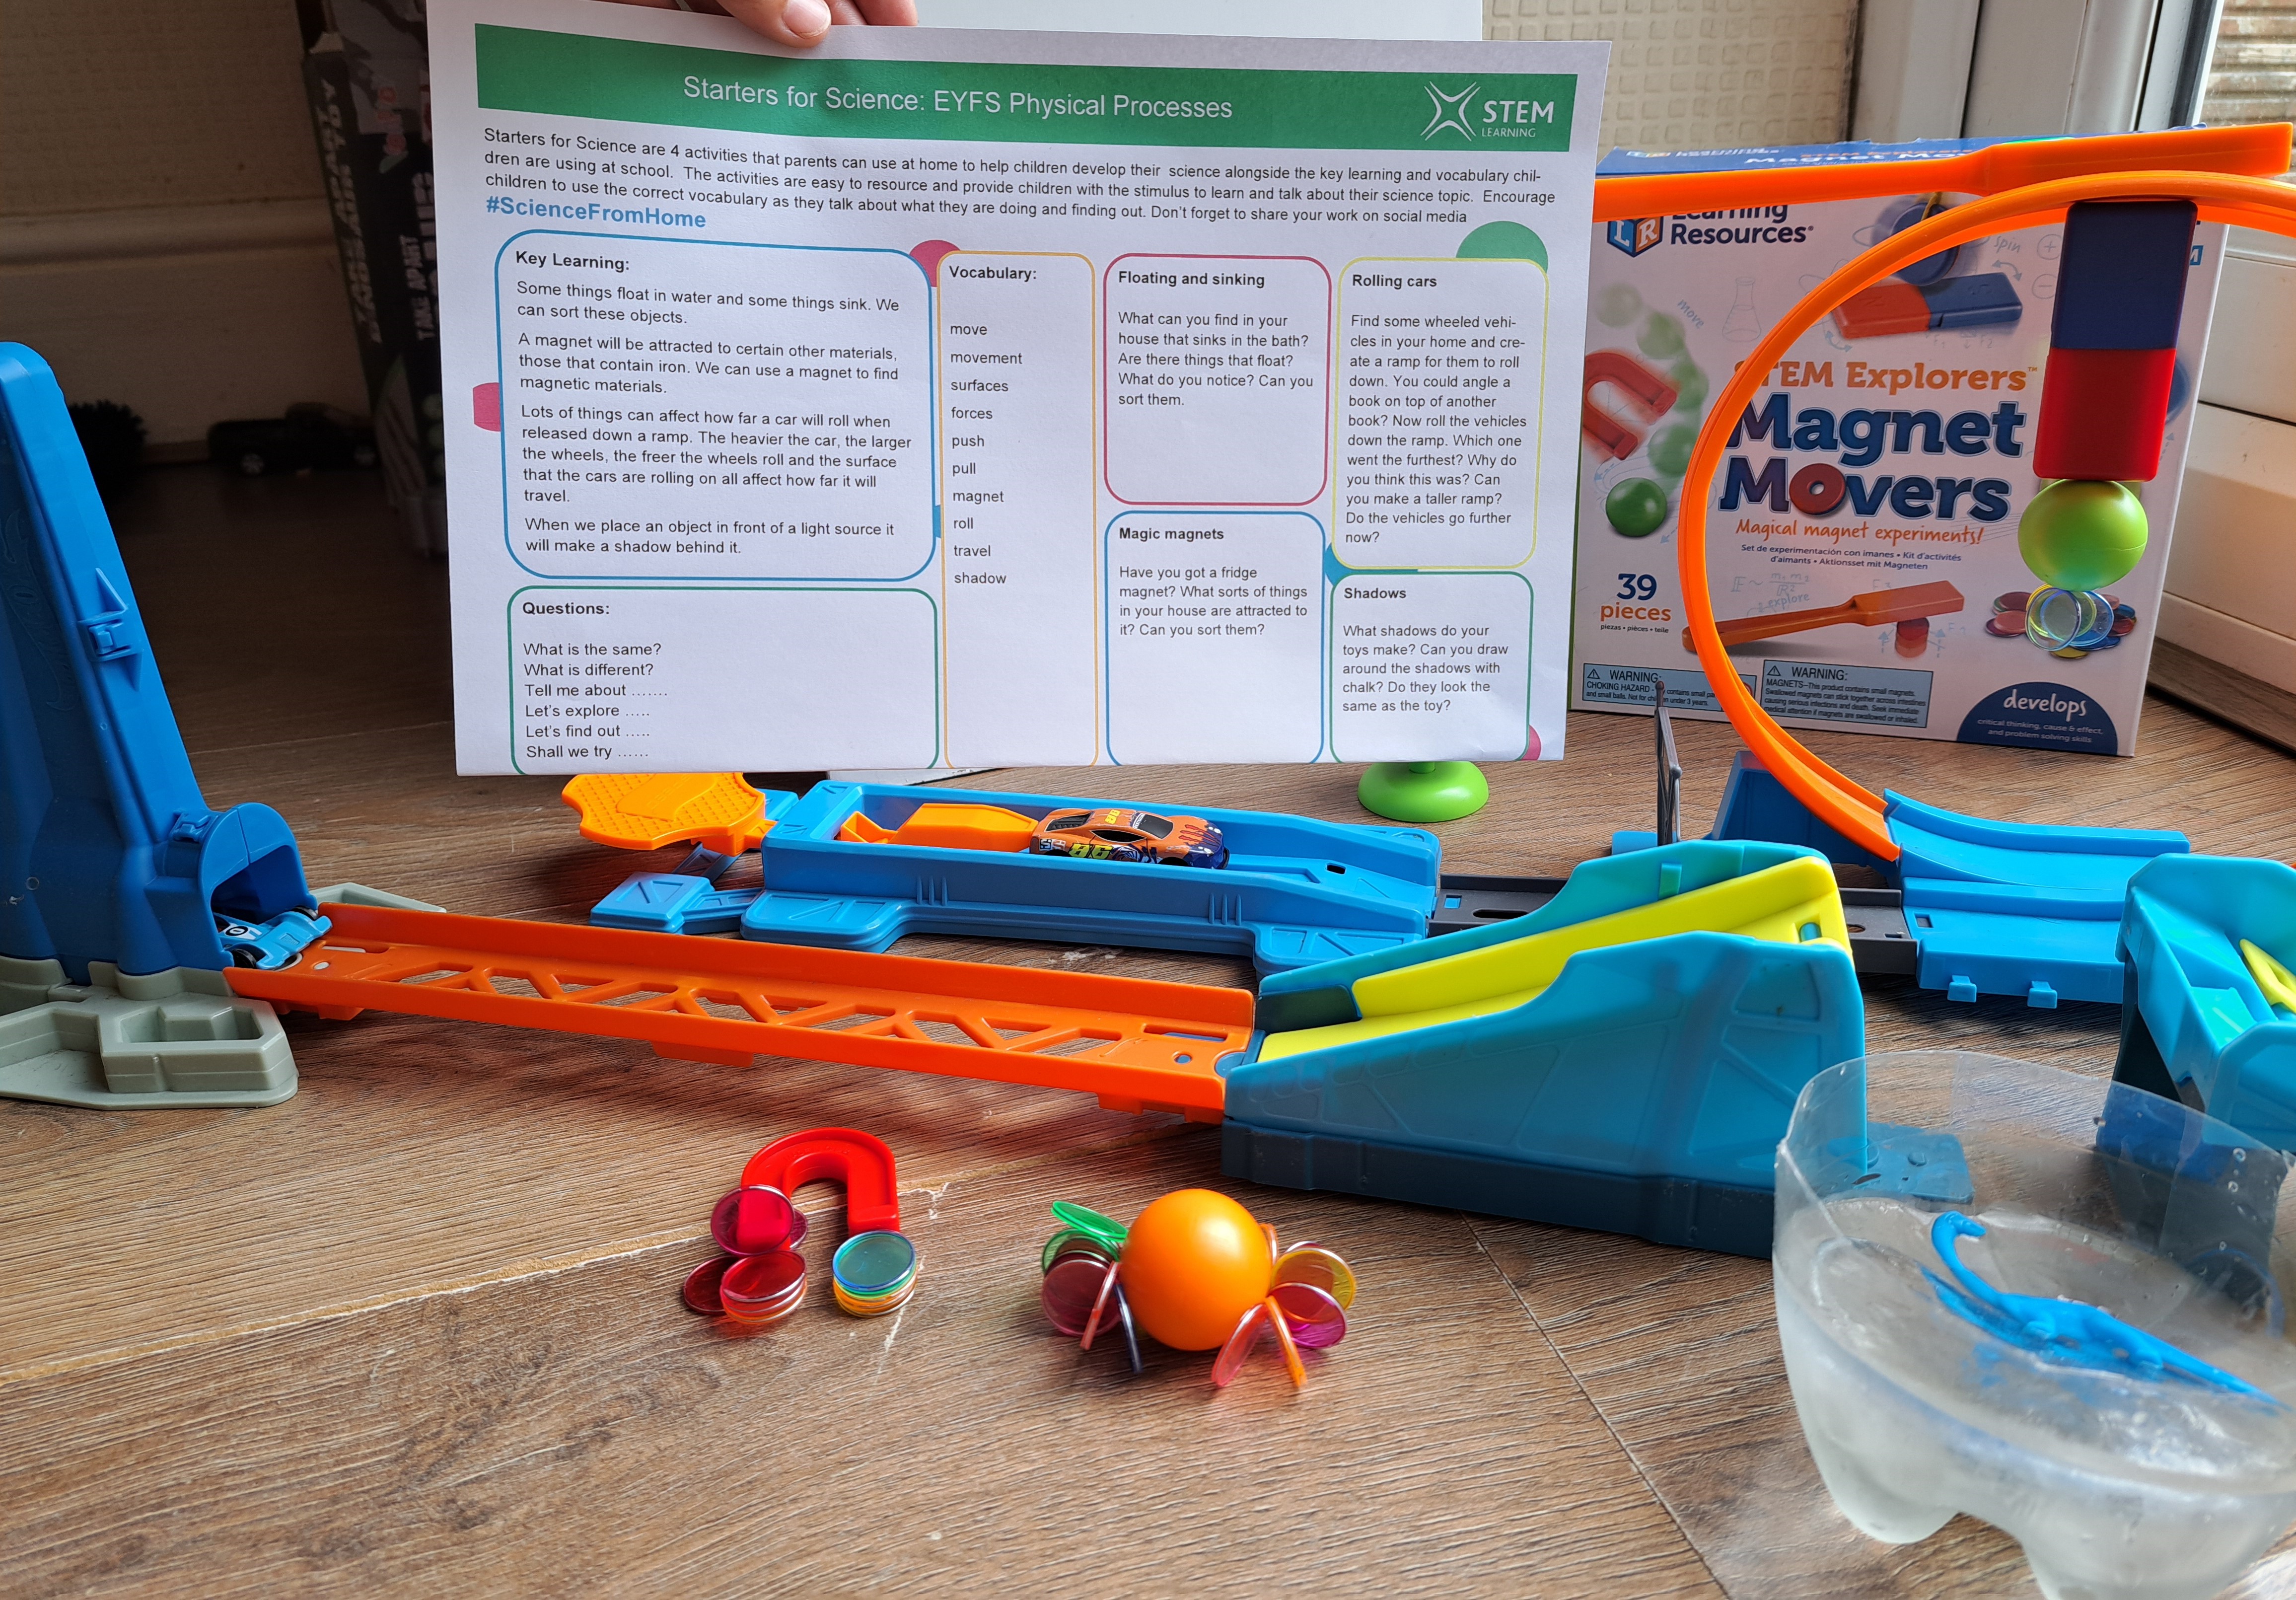
Required Materials (for 10 Families)
- 10 STEM Learning leaflets on Physical Processes,
Cost = £0
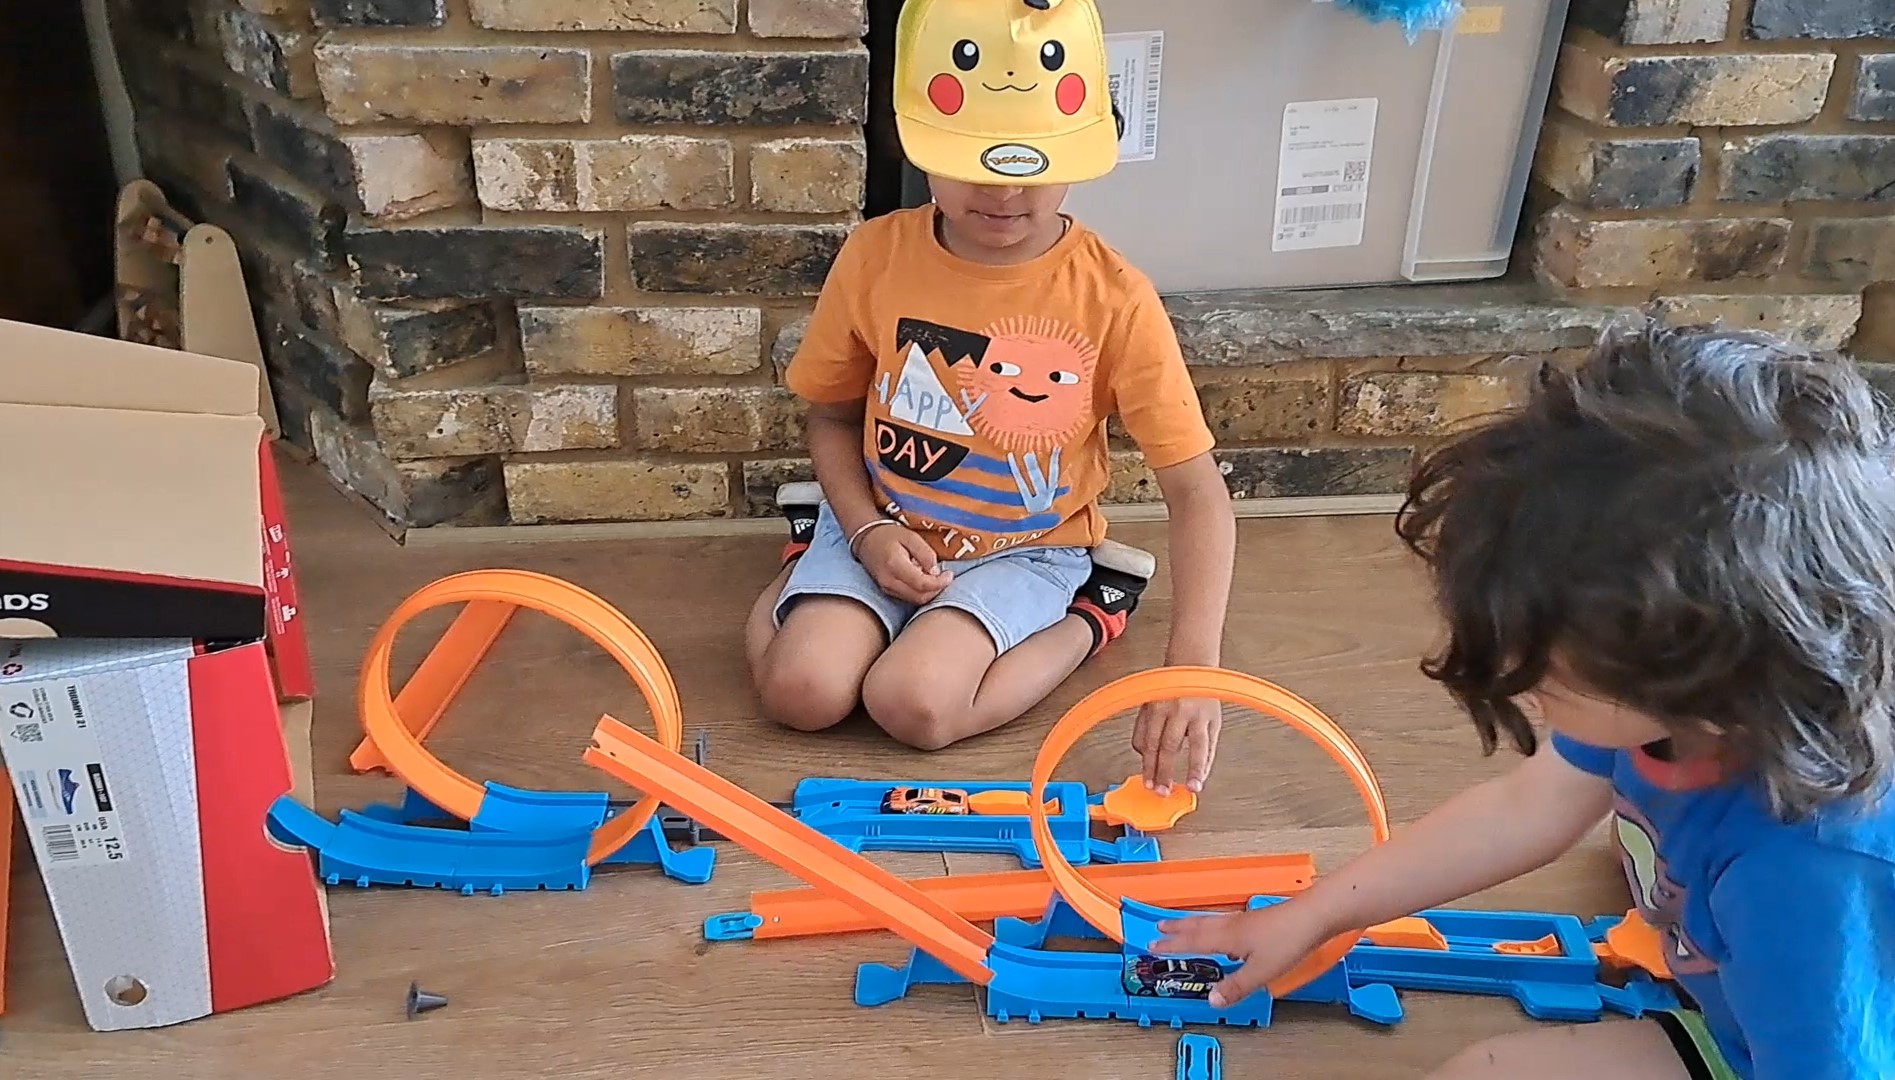
Ramps/Jumps Car Activity
-
Double Track racing set, Cost = £12.99
-
Metal Machines racing set, Cost = £12.99
- 2 cardboard boxes, Cost = £0
Magnet Activity
-
STEM Explorers: Magnet Movers, Cost = £18.99
- 2 cardboard boxes from above, Cost = £0
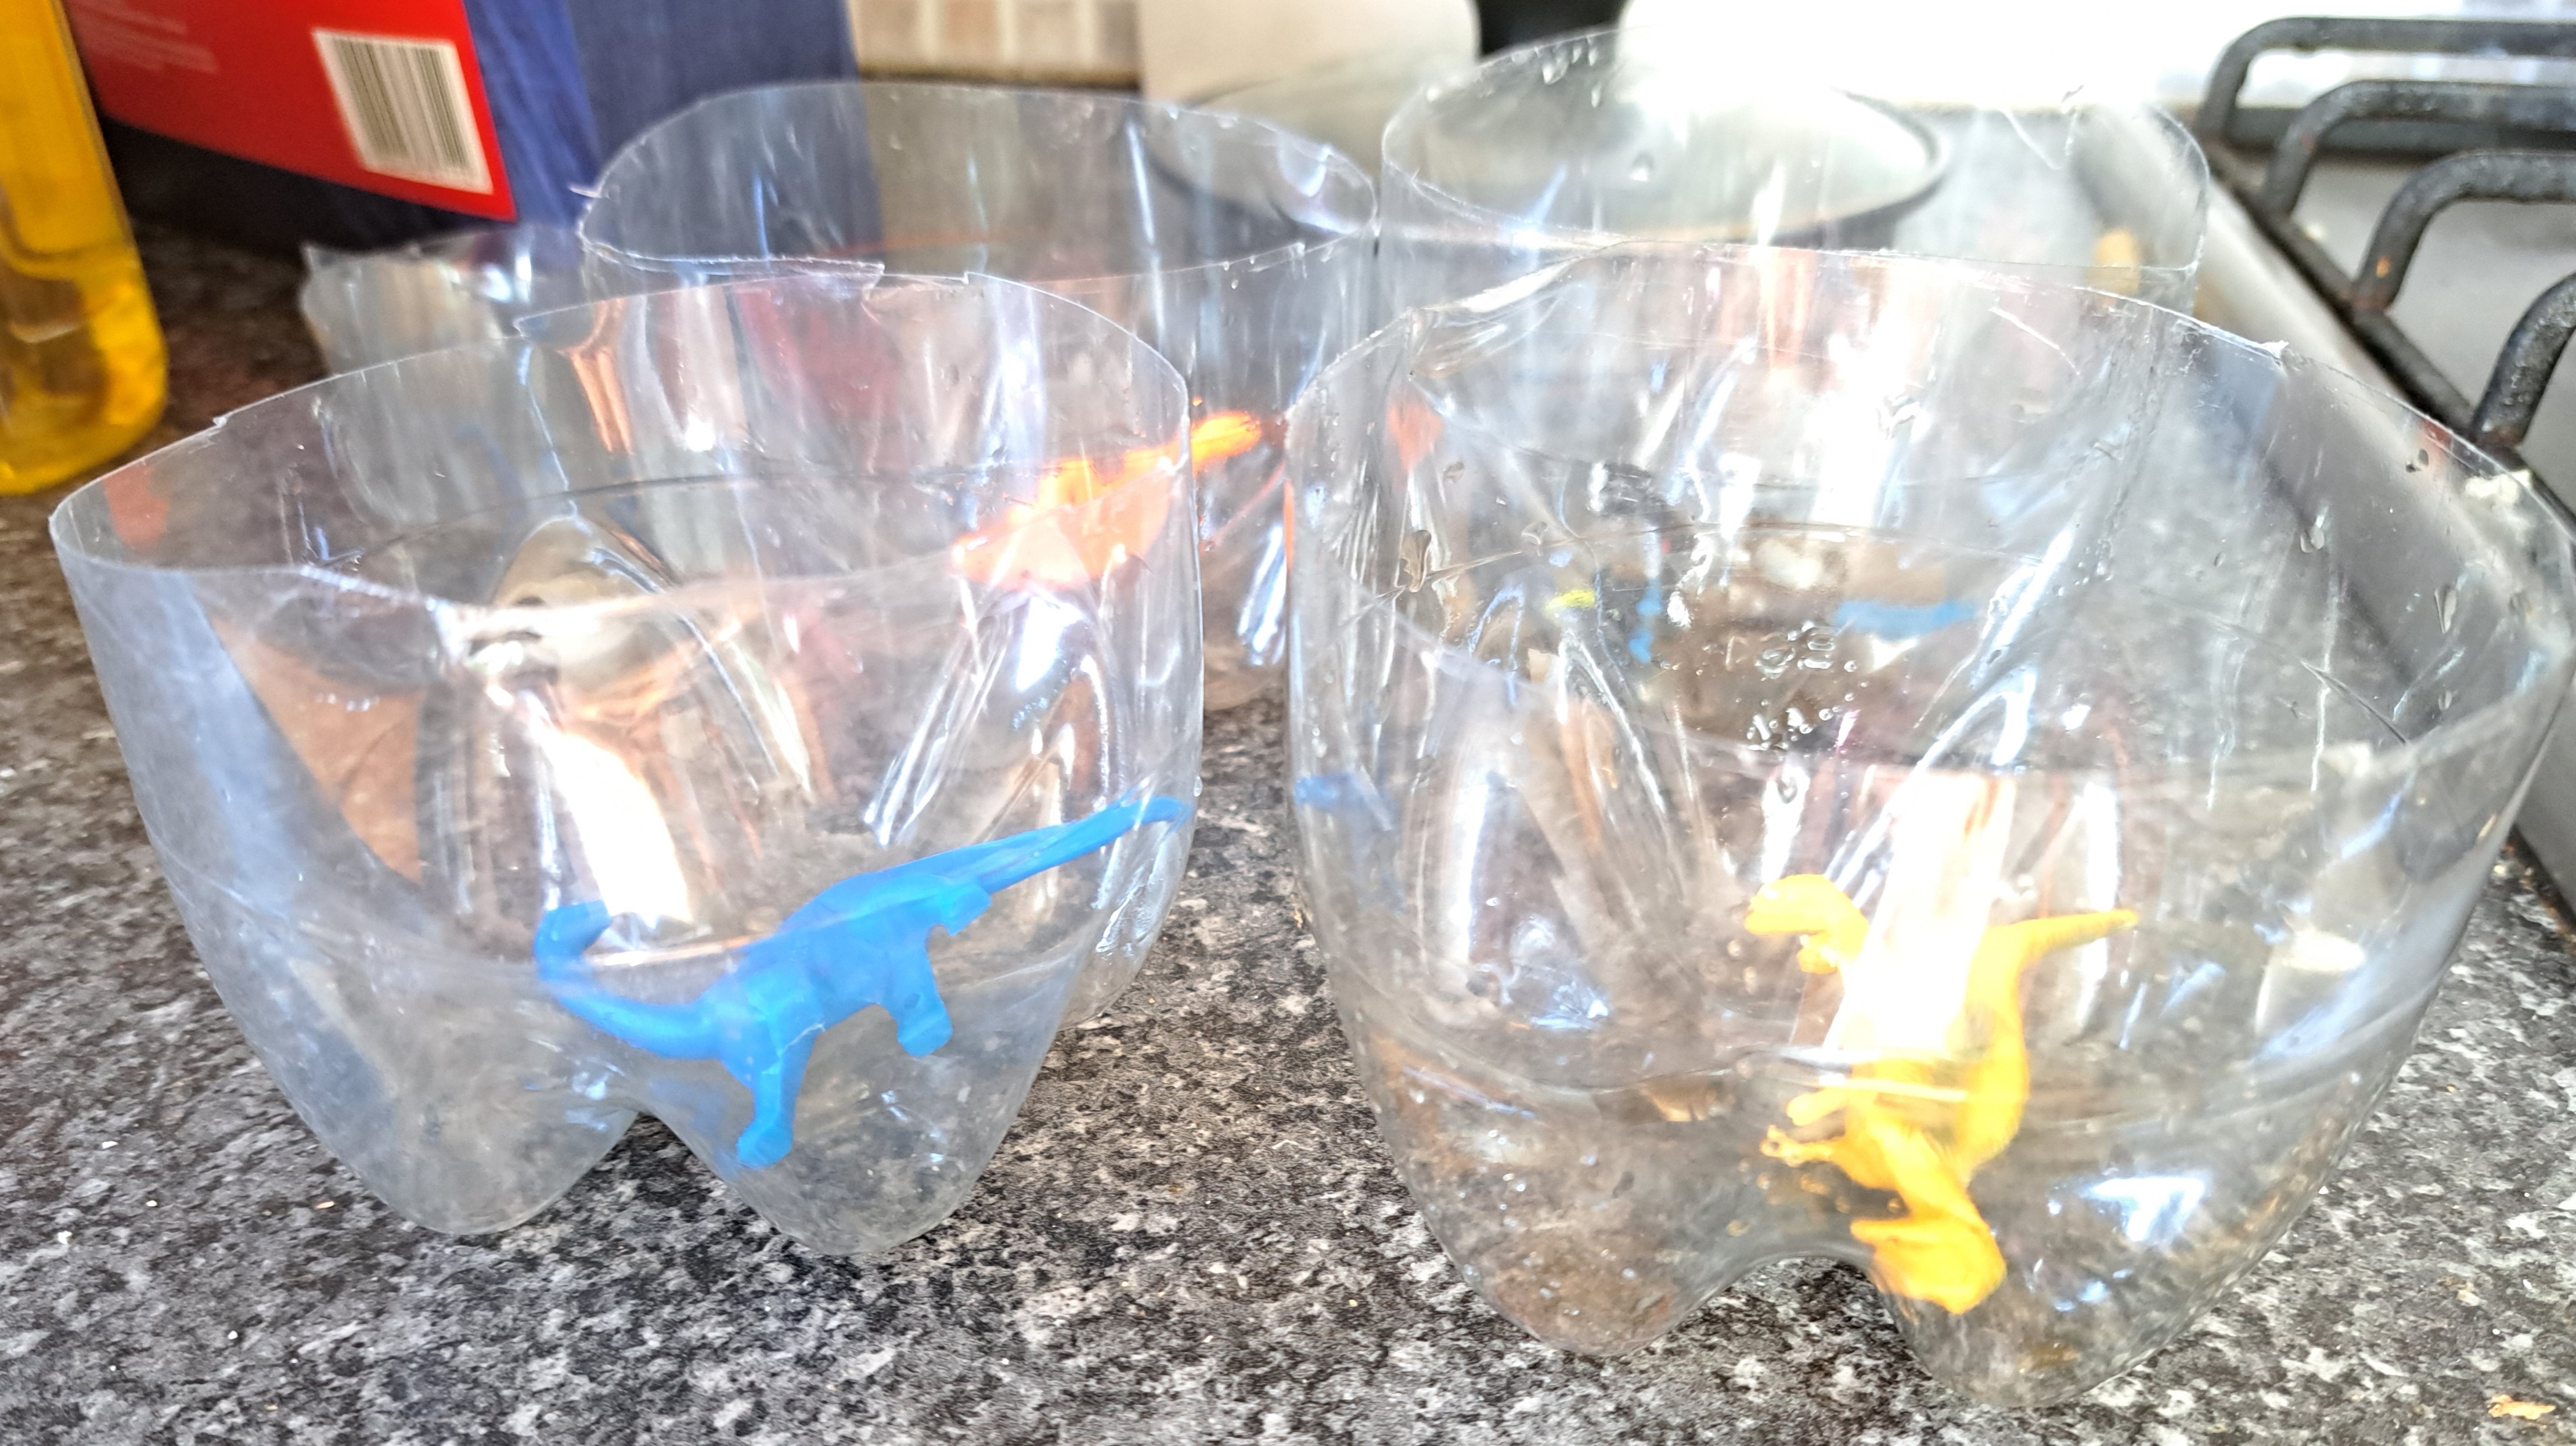
Animal Dig Activity
- 10 2L bottles, Cost = £0
-
12 plastic animal set, each approximately 1 inch (of these, the safari look best), Cost = £9.99
-
20 piece paintbrush set, Cost = £5.99
-
Table Salt, Cost = £0.65 for 750g (only need a few teaspoons)
-
12 colours x 10 mL food colouring set, Cost = £5.29
-
27 plastic coloured cups (or similar) [only really need 10 cups but this is a good set] , Cost = £9.99 or £0 if use ordinary cups
Sink or Float Activity
-
20L transparent storage box (useful for storing Science Saturday supplies as well!), Cost = £9.49
- Random objects from around house (note: do not use anything with metal, batteries, electronics, etc), Cost = £0
Total Cost = £86.37 if buy all supplies
Total Cost per Child = £8.64
Total Cost = £71.09 if buy supplies above (and already have food colouring and cups from Nature Session)
Total Cost per Child = £7.11
Plan for Day
0. Prep work to do before session!
A. Cut 10 2L bottles so that you have just the bottom 2 inches of the bottle.
B. Put a plastic animal into each bottom section of the bottles, fill with 1 inch of water.
C. Carefully place bottle bottoms into freezer at least 1 day before the session.
1. Welcome families: Encourage children to check on their plants (ours weren't growing yet). Put out car sets for kids to play with as they
arrive. Ask parents to put on name tags so people can learn names, any first-time families if they are ok with pictures being taken/shared, and for parents to
complete pre-sessions survey.
2. Ramps/Jumps Car Activity: Show children the car launchers and explain how the launchers work (the rubber band under the launcher stretches and then releases
to launch car). Discuss how energy stored in the rubber band is transferred to energy for the car. Show the children how pulling the launcher back further
makes the car move faster/further. Then encourage the children to experiment with making the cars go around the loops and along the ramps. Finally, ask
the children to set up a track that launches the car into
an empty cardboard box (or create your own challenge). Guide the children as they troubleshoot their tracks.
3. Magnet Activity: The Magnet Movers kit comes with 10 suggested experiments you may want to follow, but we did not. Show the children the different types of
magnets (U, bar, wand, circles, balls). Then let the children free-play with the magnets for 5-10 minutes. Once the initial newness wears off, tell the children that
we are now going to do 3 experiments using the magnets. Emphasize the word "experiment" and explain that scientists use experiments to investigate questions
we have.
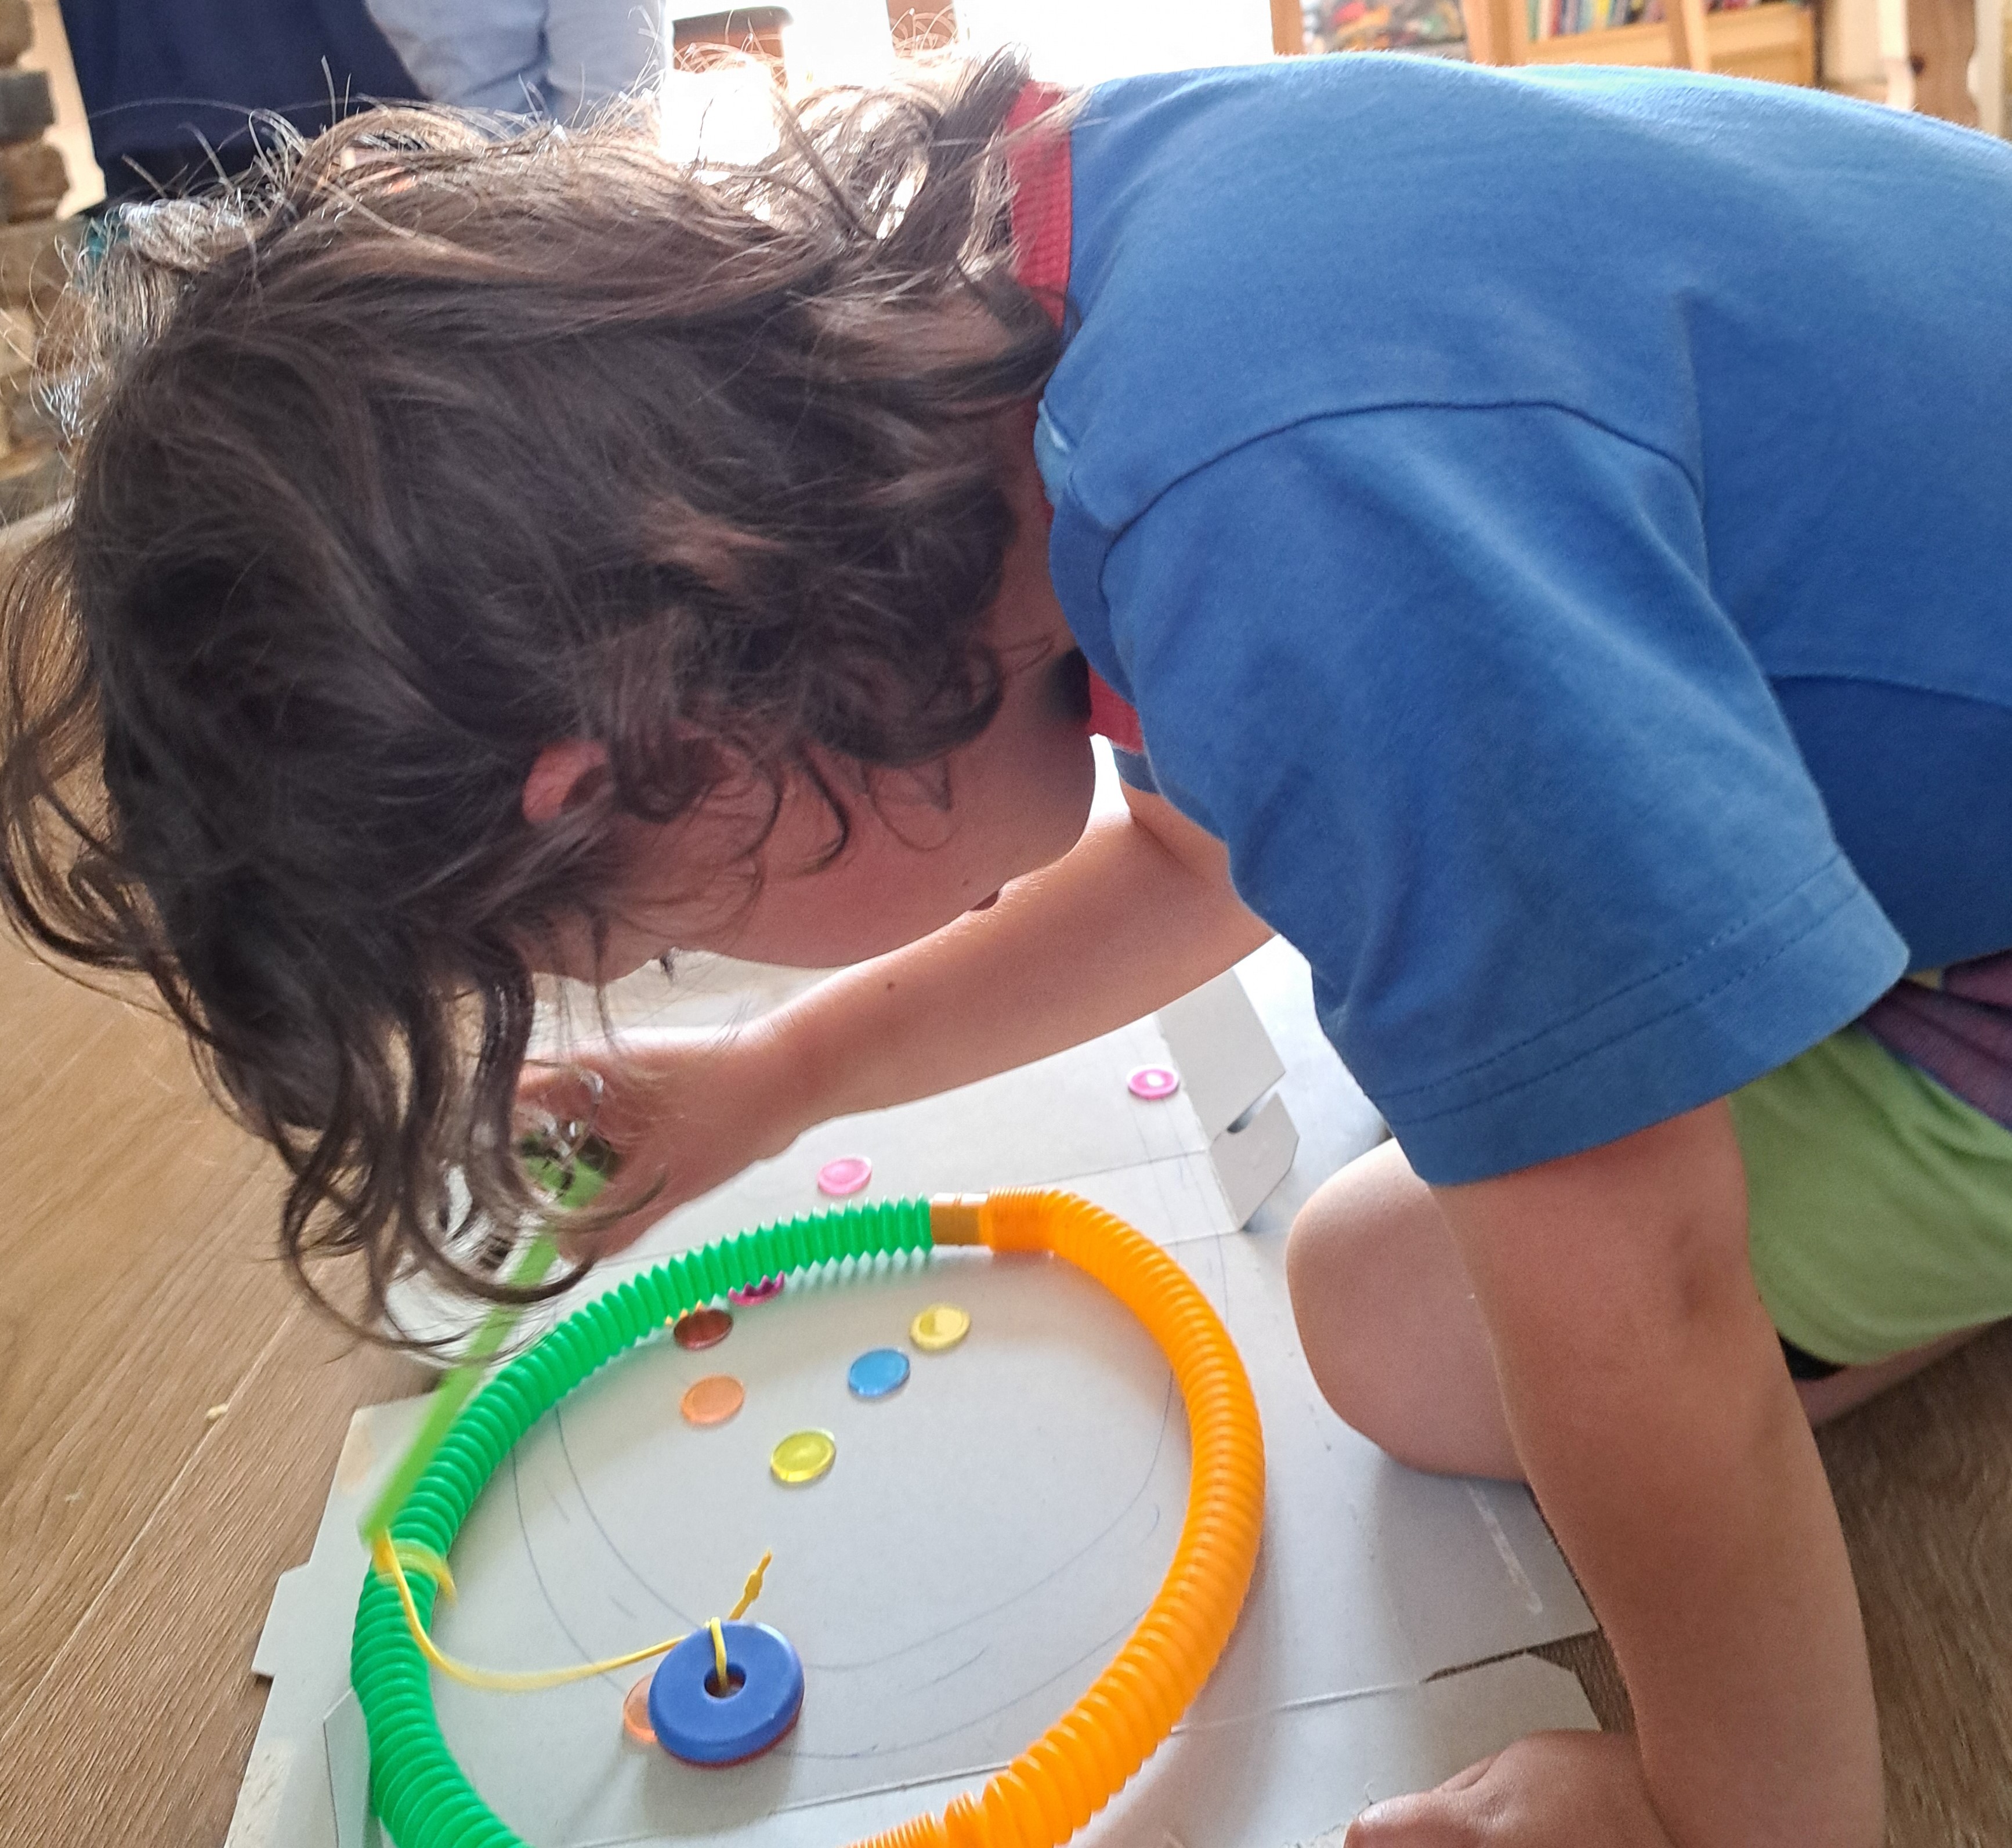
Experiment 1: Track Racing: Unfold the cardboard box used in the Ramps/Jumps Car Activity and draw a race track on the inside of the box. Then put a magnet
disk on top of the race track and "drive" the magnet disc using a magnet underneath the cardboard box. This experiment shows the children that magnets can
work through a cardboard box. Create twisty tracks to increase the challenge!
Experiment 2: Speed Cleaning: Have the children each select 1 of the bigger magnets. Put all of the remaining magnets on the unfolder box. Then have the
children "speed clean" the box by sweeping their big magnet back and forth. This experiment teaches the children that their big magnet can "hold" multiple
smaller magnets. Ask the children to count how many objects their chosen magnet collected.
Experiment 3: Magnet Fishing: This activity is in the kit booklet. Tie a circle magnet to the end of the rod and use it to "fish" the small magnets. This
experiment lets the children practice using the magnets.

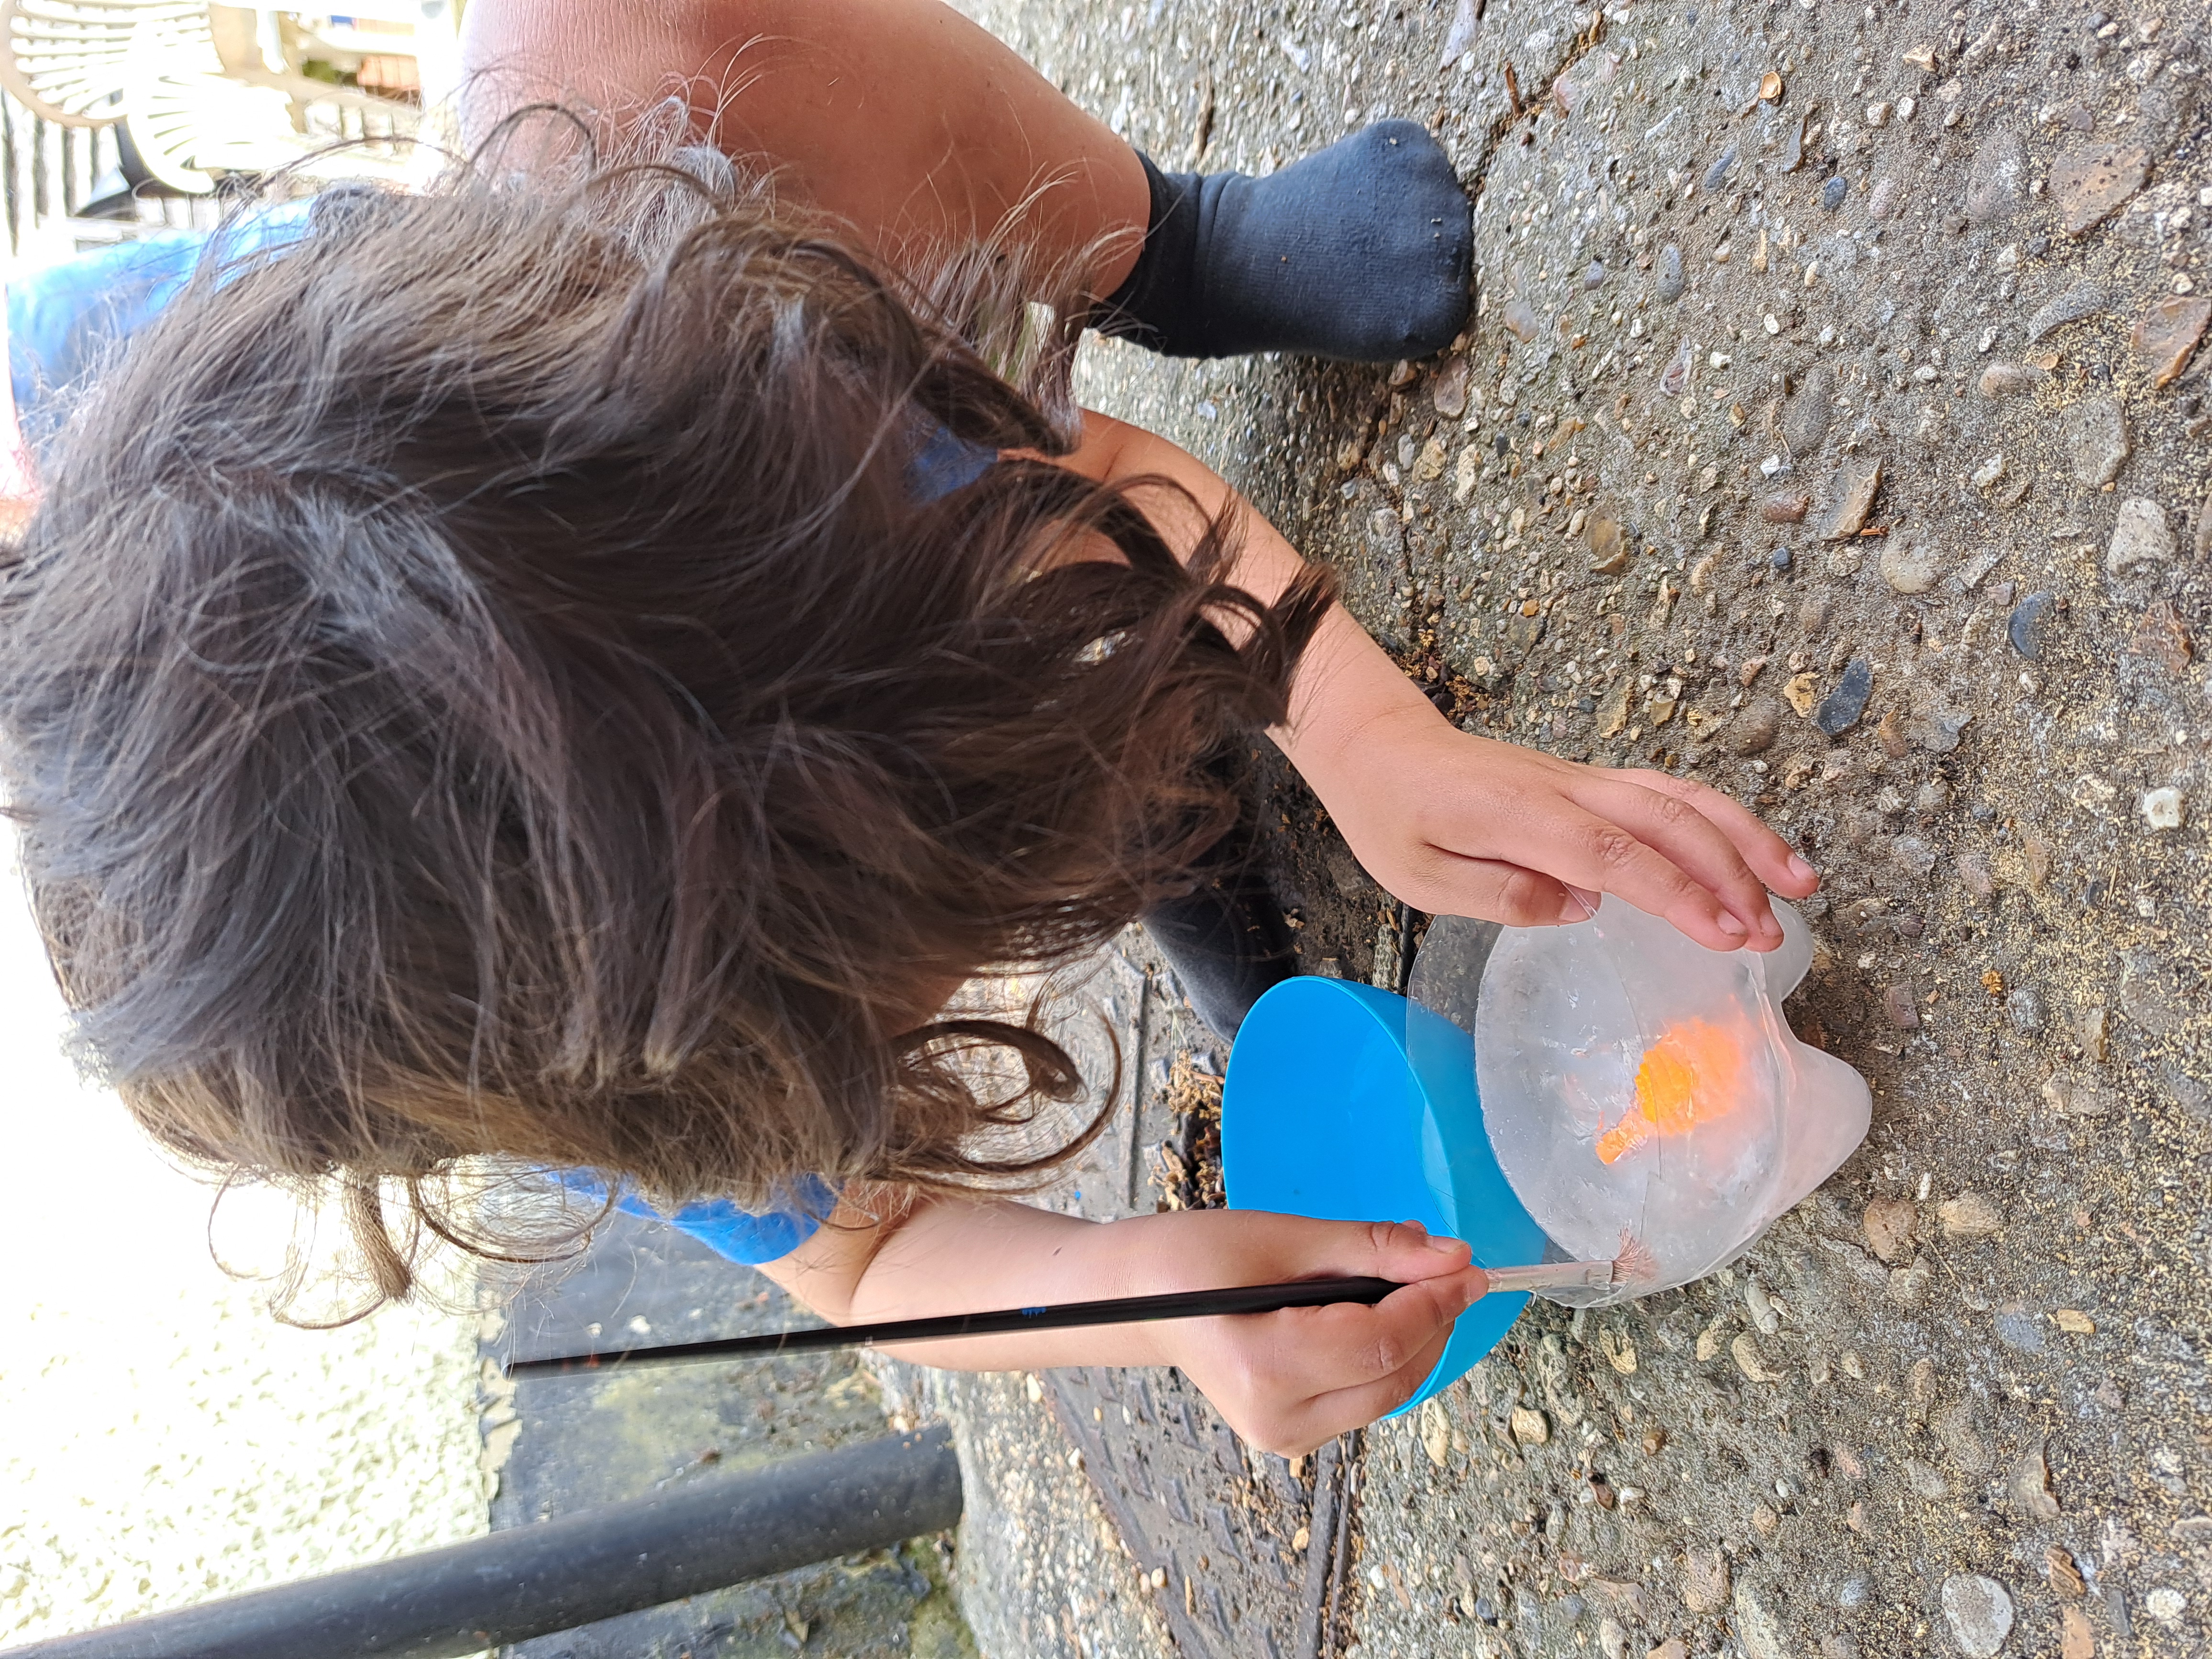
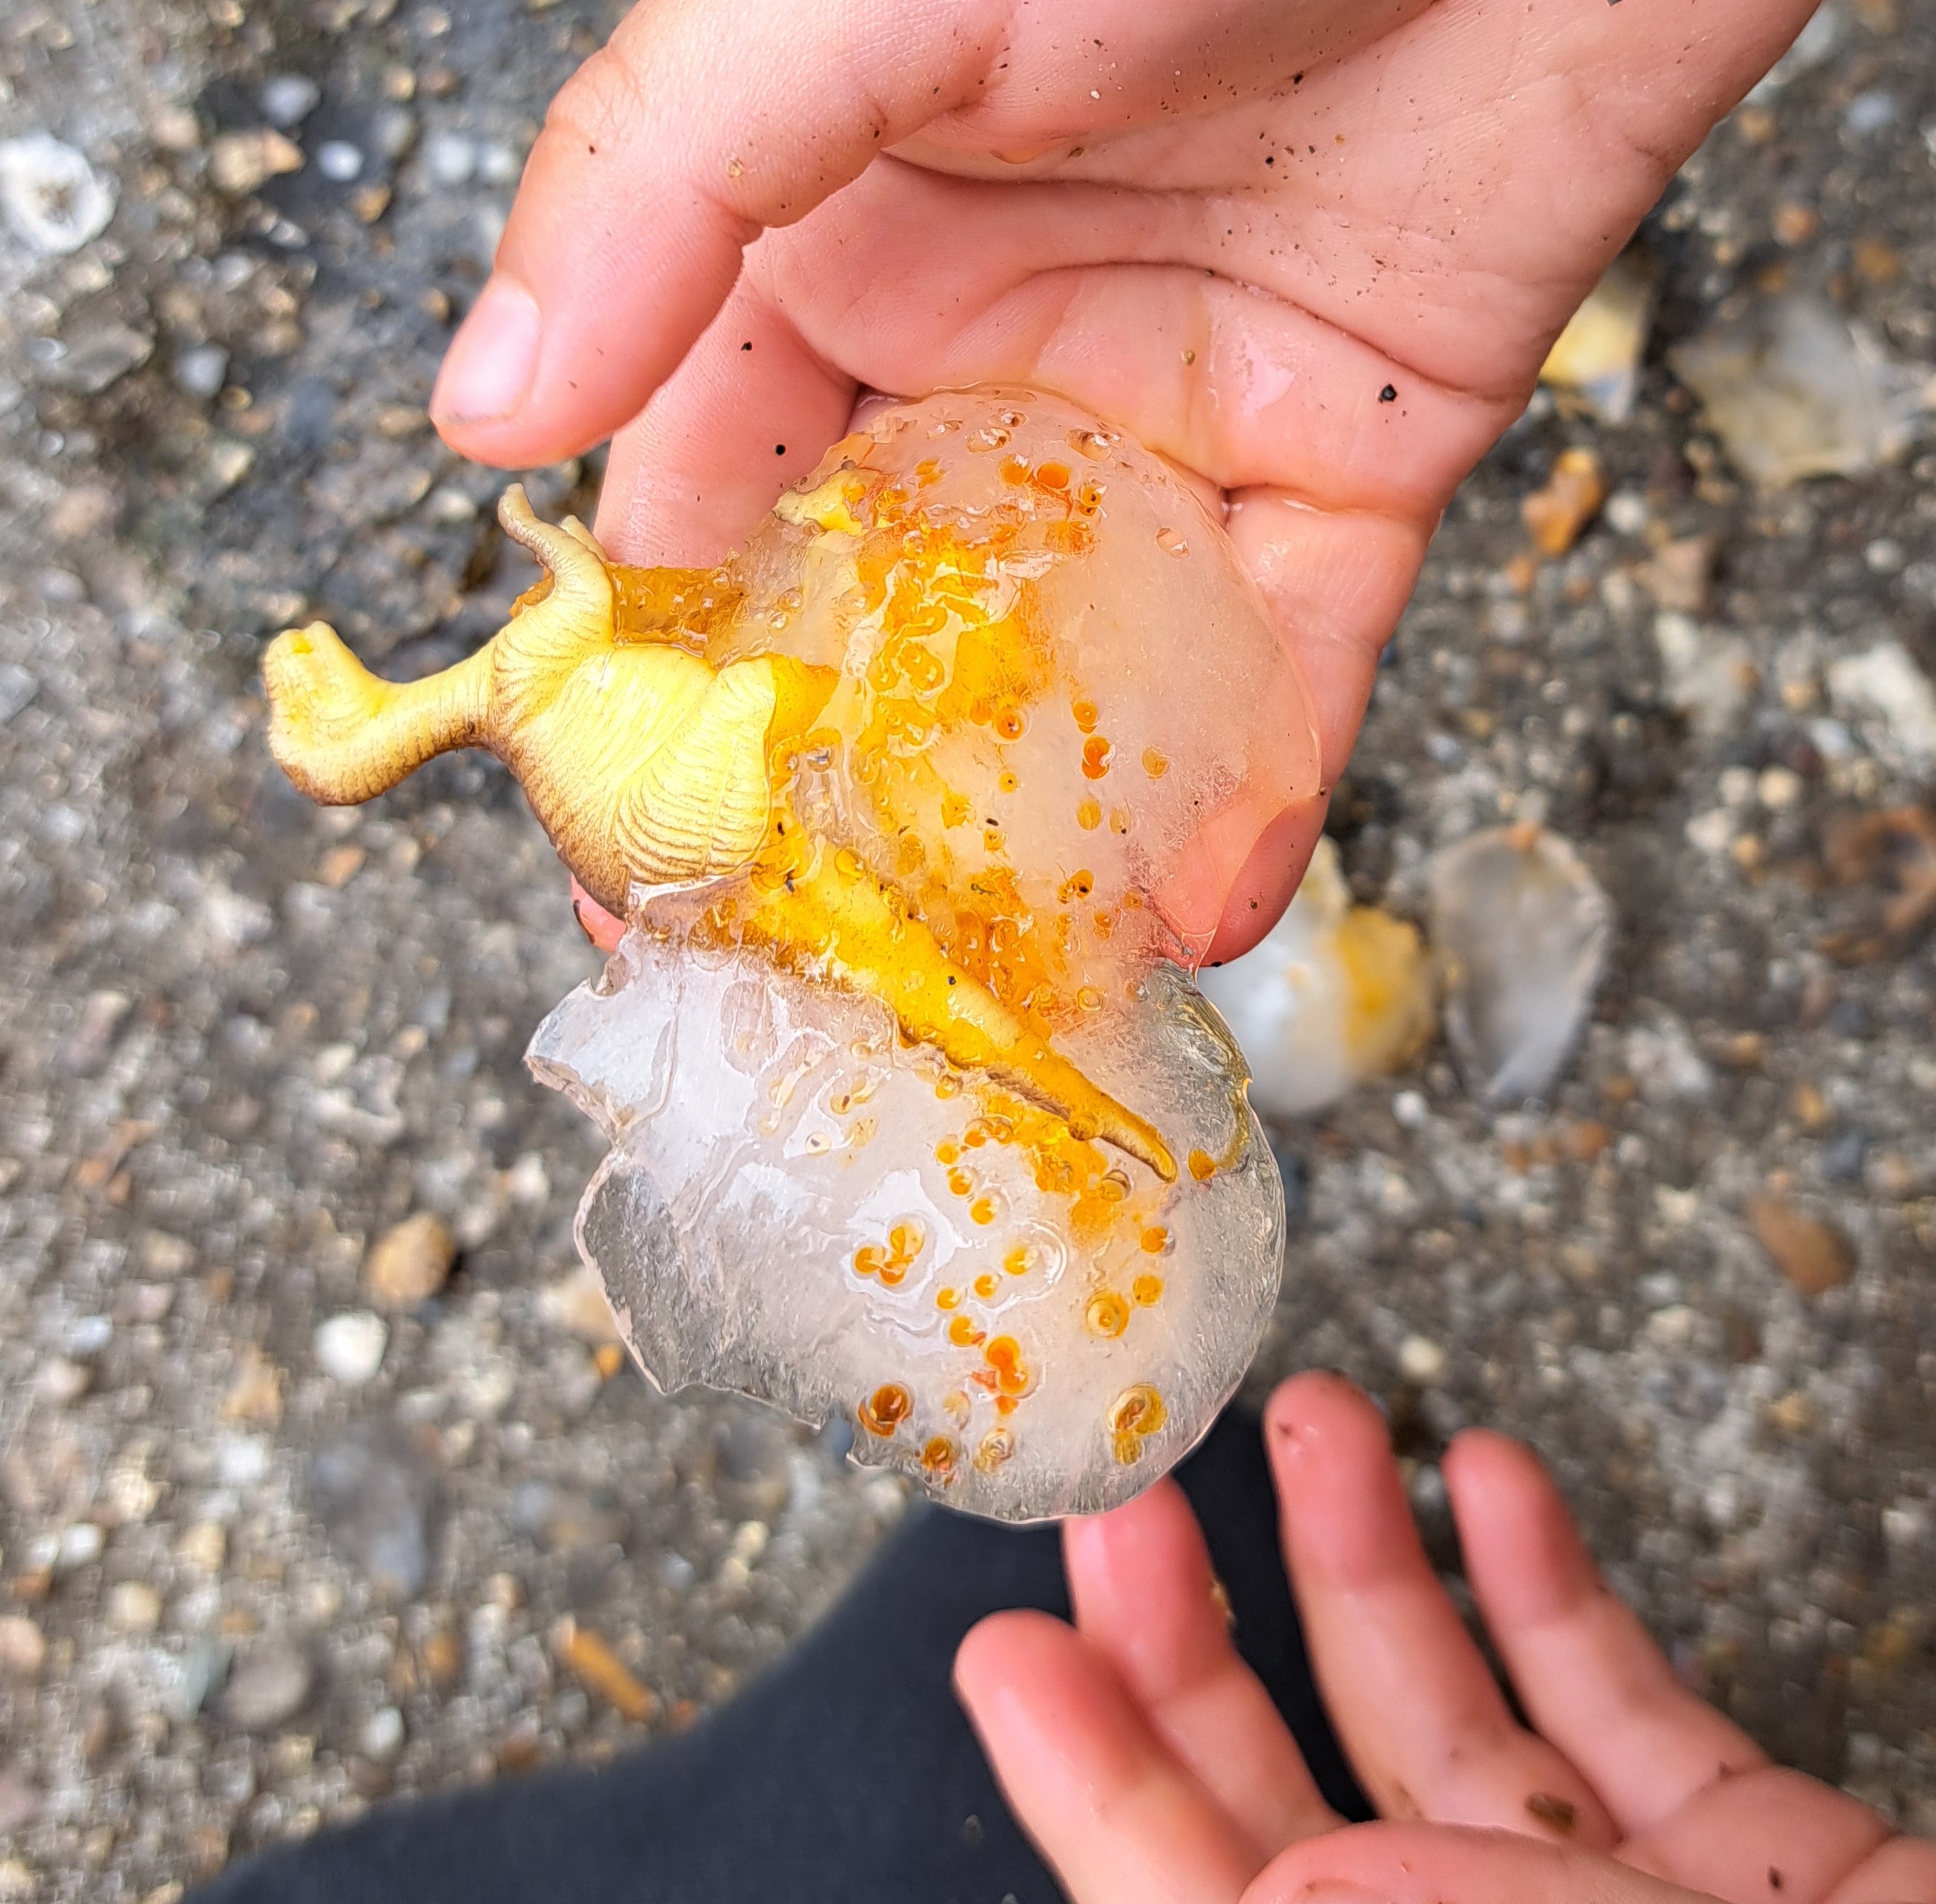
4. Animal Dig Activity: I highly suggest doing this activity outside. Melting water and food colouring will go everywhere! Give each child a frozen bottle
bottom (see Step 0) and a paintbrush. Share cups of water between the children.
Ask the children what is in the bottle bottom (ice) and what is in the cups (liquid water). Then ask if ice and liquid water are the same thing and how we
can switch between the two (freezing in freezer, melting at room temperature). Let the children "paint" water onto the ice for a while. ("Painting" with
the paintbrush is good for building up the muscles in their hands that they use for writing.) The ice will
start to melt (especially if it's a warm day), but the animal will still be frozen inside. Sprinkle salt over only half of the ice. Let each child
choose their favourite colour from the food colouring set. Add 1 drop of that colour food colouring to each half of the ice. Ask the children to
compare what happens to the 2 drops of colouring (the food colouring rolls off the half of the ice without salt, but sinks into little holes on the half where
salt was sprinkled, this is because the salt melts small holes into the ice). It will take a long time for all of the ice to melt so I suggest moving onto
the next activity after doing the salt/food colouring experiment. You can use any remaining ice in the next activity.

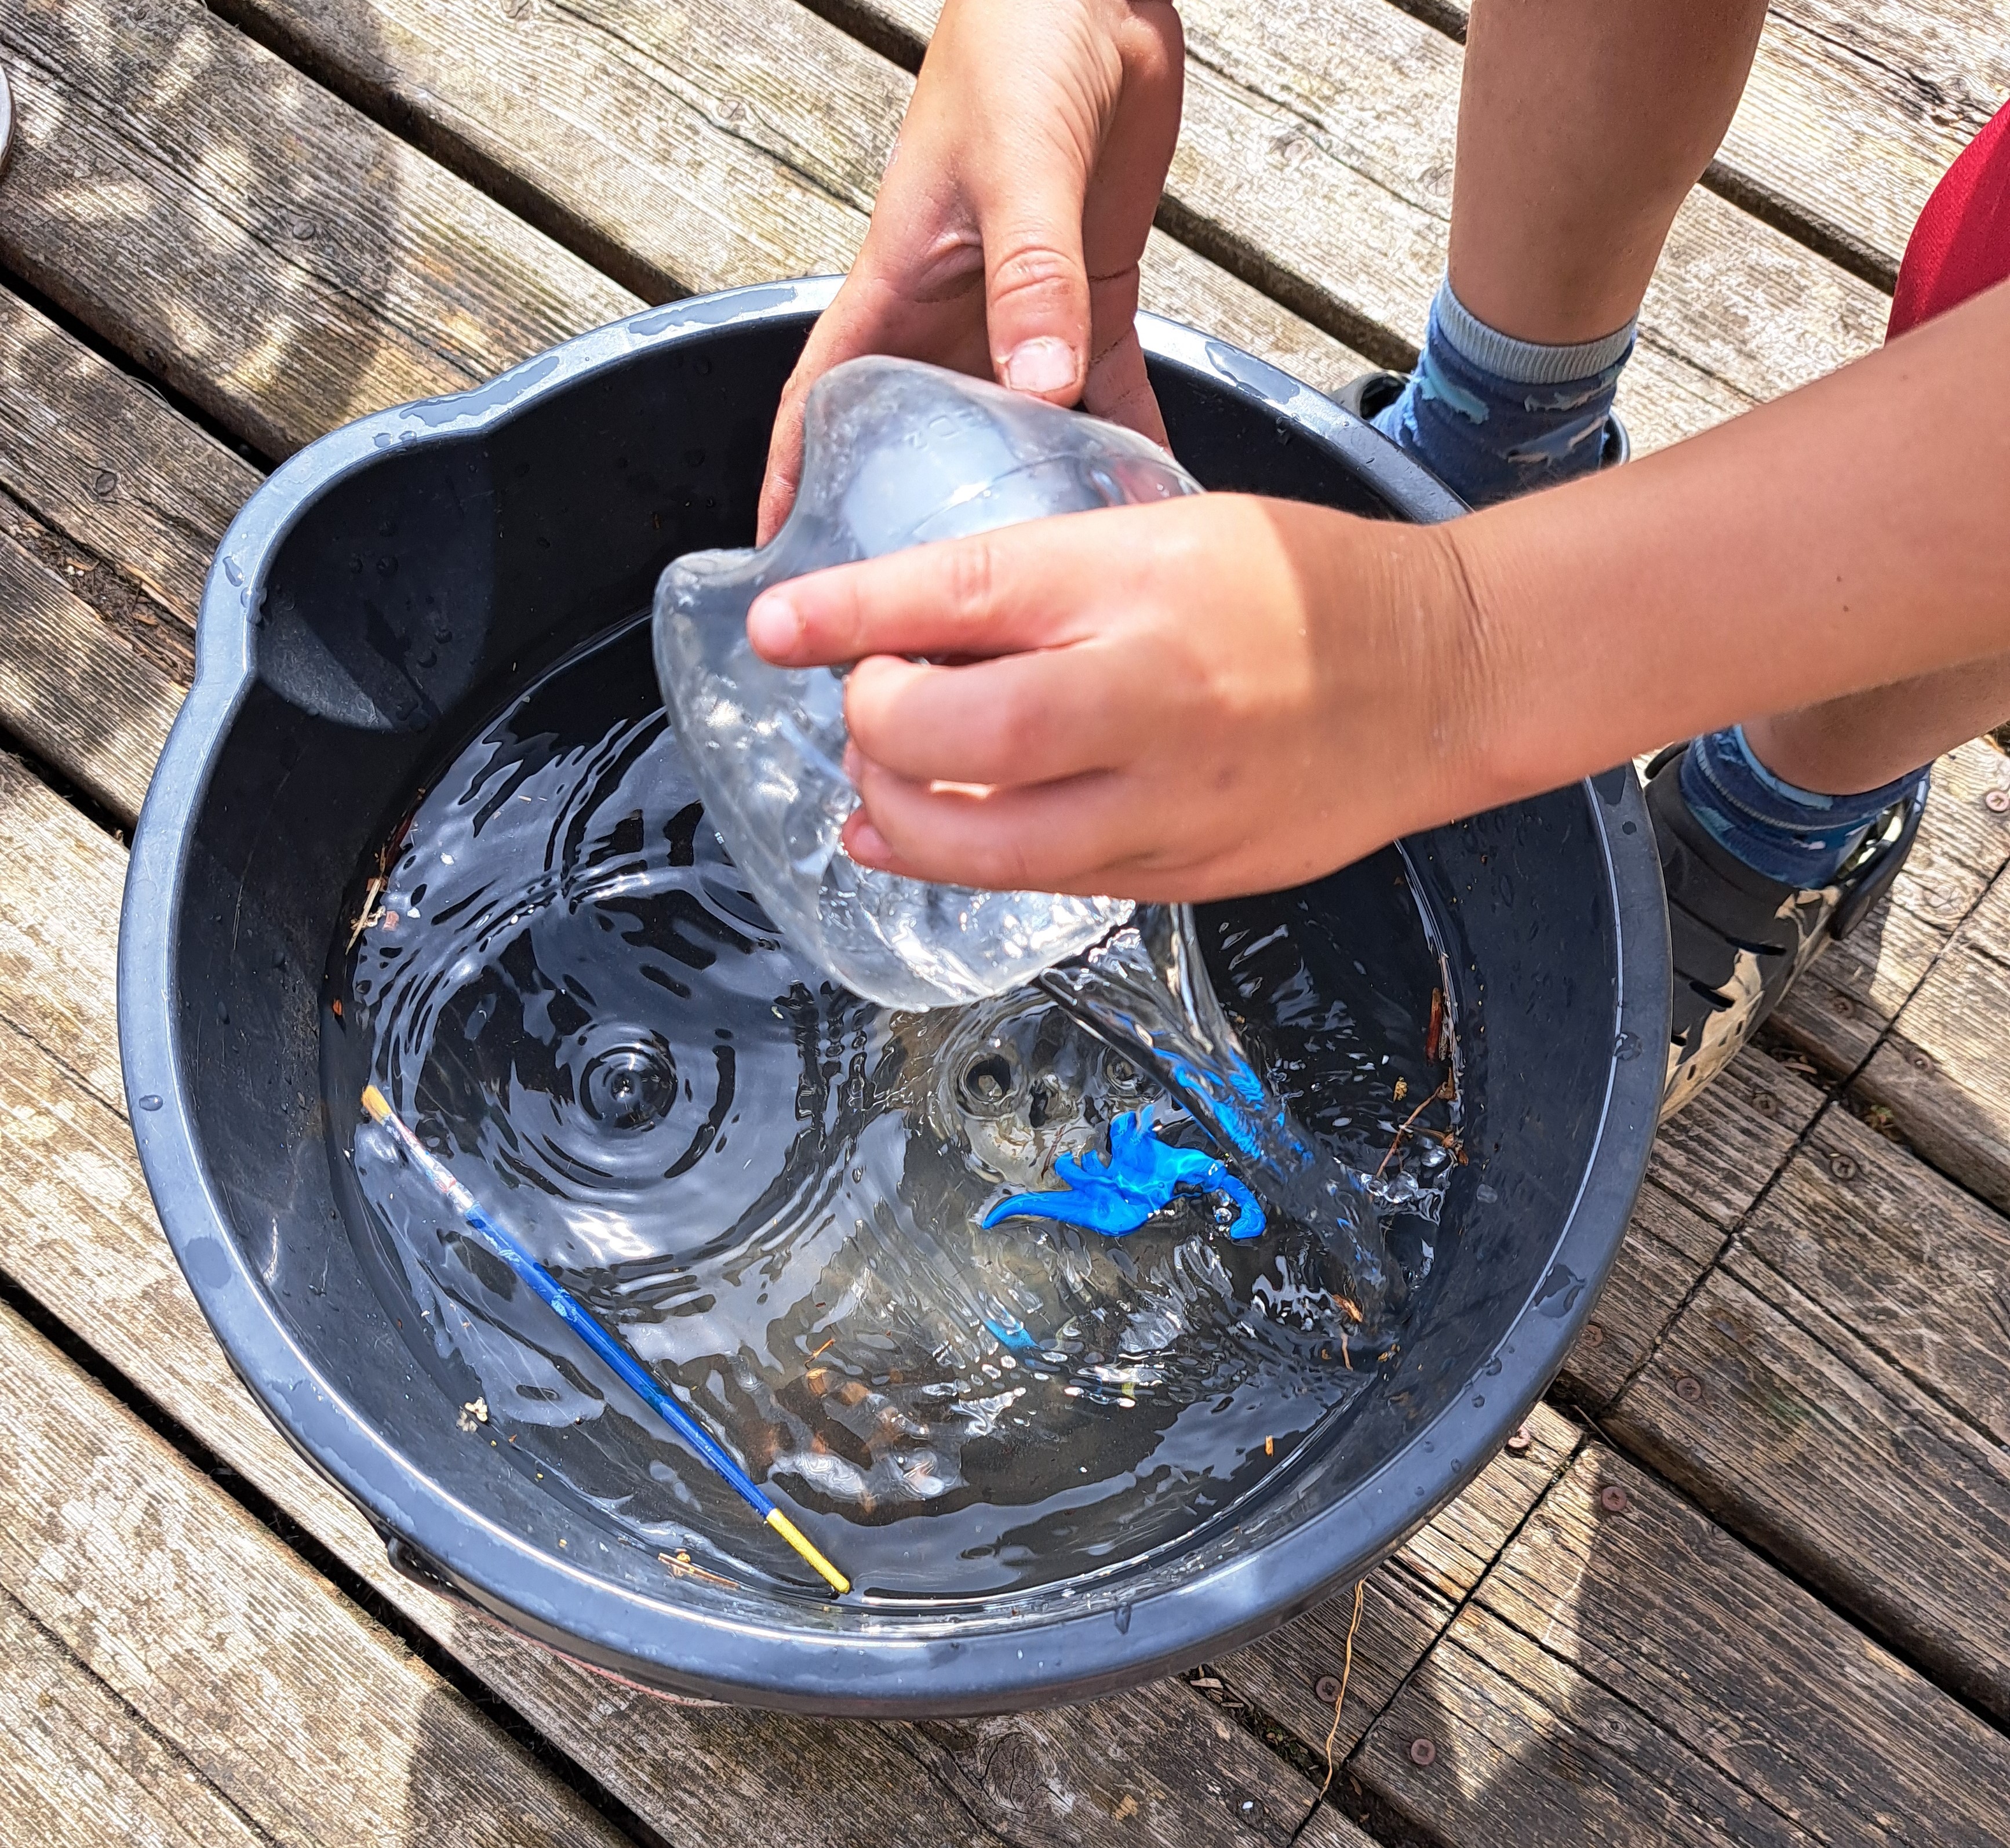
5. Sink or Float Activity: This is an outside activity. Fill the box 1/2 - 3/4's with water. Hold up a paintbrush and a rock and ask the children whether they think each will sink or float.
Once the children have decided their answer, add each to the water. Talk about how the rock sinks and the paintbrush floats (at least ours did!) - and how we call
this property "density". Things that are more dense than water sink - and things less dense than water float. Ask the children to walk around the yard and collect
other items (for example, sticks, leaves, other rocks, acorns, etc) to test in the water box. Have the children gather around the water box with their objects.
Remind the children that they learned about the word "experiments" in the Magnet Activity - and that scientists use experiments to investigate questions they have.
Explain that scientists make guesses about what the answers to the questions will be - and that we call a guess a "hypothesis". Ask the children to make
a hypothesis about whether each object will sink or float. Then put the object into the water box to test the hypothesis. Again, emphasize the words "hypothesis" and
"experiments" so that the children learn these words. (Note, do not put electronic objects or anything with batteries/metal that could rust, etc into the water box.)
6. Recap Activity: Have the children sit in a circle. Remind them of the different activities they have done in the session. Then ask the children which of the
activities was their favourite and why. (There are no right/wrong answers - this is just to help the children think through the potential options.)
7. At the end of the session, mention a highlight of the next Science Saturday session to keep families interested in attending!
Skills Learned/Practiced
STEM SKILLS
-Gaining basic understanding of energy storage and transfer (rubber bands to car motion)
-Gaining intuition about how cars move on ramps, loops, etc
-Problem-solving how to make cars land in specified locations
-Being familiar with different types of magnets and what magnets do
-Being familiar with the word "experiment"
-Understanding different states and possible transitions of water
-Understanding how salt affects ice
-Gaining intuition about density: predicting which objects will sink vs float
NON-STEM SKILLS
-Teamwork: working together to make cars land in specified location
-Fine motor skills: using paintbrush to "dig" out dinosaur
-Communication: talking about favourite activity
Outputs/Take-Homes from Session
-STEM Learning leaflet with suggested activities to learn more about Physical Processes
-Pictures taken of families during session
Other Articles:
How SpaceX land first stage boostersThe algorithms that SpaceX (probably) use to control their first stage boosters. Several animations. |
|
Quantum MechanicsA no-nonsense description of quantum mechanics with no maths or philosophy. The concepts are explained with animations, which are mainly computer simulations of electrons. |

|
|
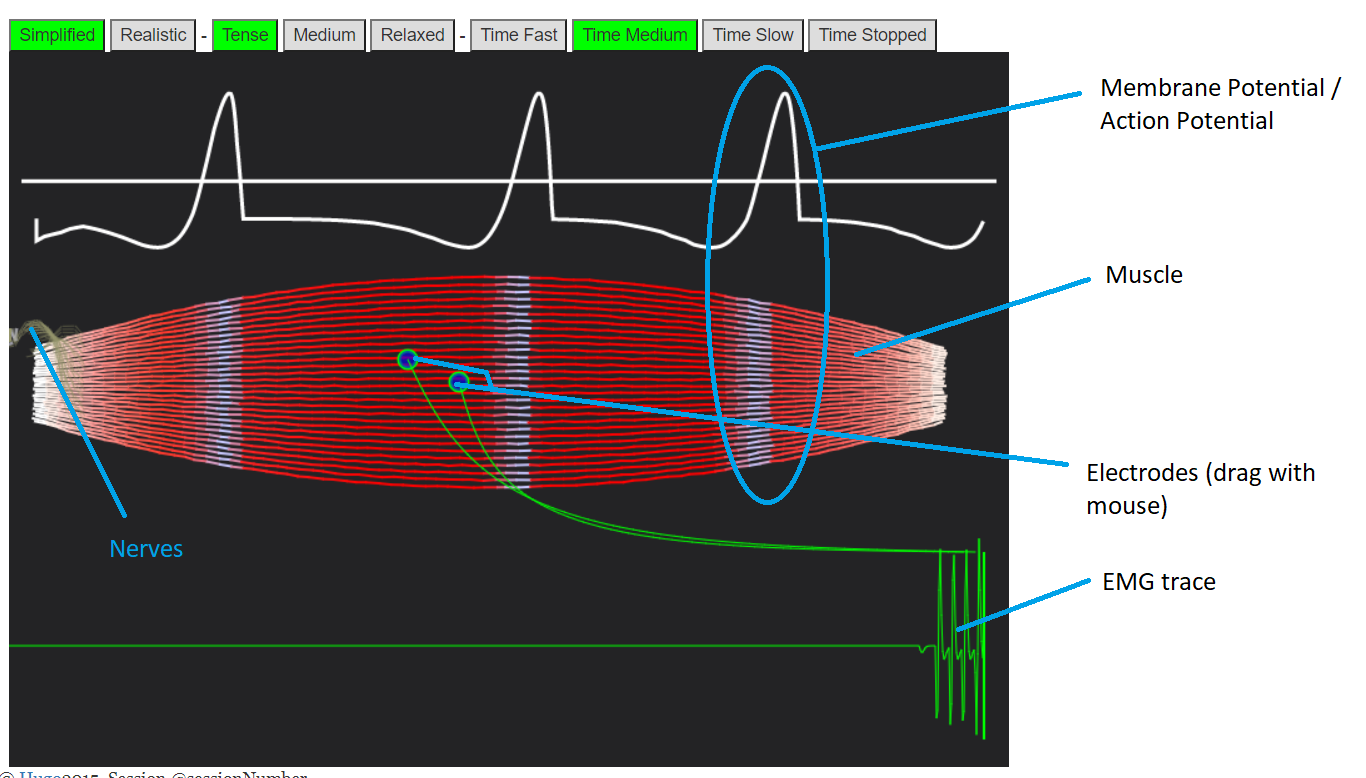
BodyWorks: Neuromuscular Activity / Muscle EMGAn interactive simulation showing how nerves travel to and down muscles, and how this gets picked up by EMG sensors. |
© Hugo2015. Session @sessionNumber